Checkboxes là một phần tử HTML mà hầu như hiện diện trên nhiều website, nhưng hầu như rất ít người thay đổi hình dạng mặc định của nó. Vậy tại sao chúng ta không làm khác đi ? Vì như thế sẽ làm những mẫu thiết kế của chúng ta khác lạ và đẹp hơn so với mọi người.
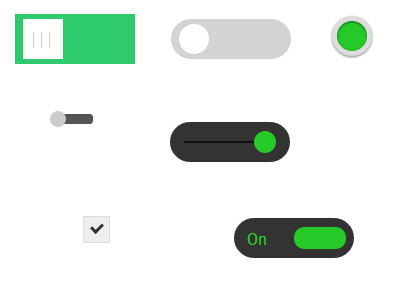
Trong bài viết này mình sẽ chia sẻ cho các bạn 7 mẫu checkboxes khác nhau để bạn có thể áp dụng vào cho chính trang web của mình.
Để bắt đầu định dạng cho từng checkbox , trước hết chúng ta sẽ làm ẩn các checkboxes, đây sẽ là định dạng dùng chung cho tất cả.
input[type=checkbox] {

    visibility: hidden;

}
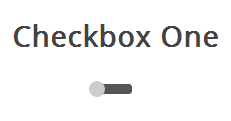
Mẫu số 1 :
HTML
Để bắt đầu mẫu này, chúng ta cần có khung html chuẩn như sau :
<div class="checkboxOne">

    <input type="checkbox" value="1" id="checkboxOneInput" name="" />

    <label for="checkboxOneInput"></label>

</div>
Đầu tiên, chúng ta sẽ cần định dạng thanh slider bar như sau :
.checkboxOne {

    width: 40px;

    height: 10px;

    background: #555;

    margin: 20px 80px;

    position: relative;

    border-radius: 3px;

}
Bây giờ, chúng ta sẽ định dạng phần tử label hành động như một nút kéo trên slider. Đồng thời chúng ta sẽ tạo hiệu ứng kéo từ trái sang phải dựa trên thuộc tính transition.
/**

 * Create the slider from the label

 */

.checkboxOne label {

    display: block;

    width: 16px;

    height: 16px;

    border-radius: 50%;


    -webkit-transition: all .5s ease;

    -moz-transition: all .5s ease;

    -o-transition: all .5s ease;

    -ms-transition: all .5s ease;

    transition: all .5s ease;

    cursor: pointer;

    position: absolute;

    top: -3px;

    left: -3px;


    background: #ccc;

}
Slider này mặc định sẽ ở vị trí unchecked (off) và khi chúng ta click vào checkbox, nút bấm sẽ di chuyển từ trái sang phải, và để làm điều này, thì các bạn thêm đoạn css sau :
/**

 * Move the slider in the correct position if the checkbox is clicked

 */

.checkboxOne input[type=checkbox]:checked + label {

    left: 27px;

}
Đó là tất cả những gì mà chúng ta cần cho checkbox đầu tiên.
Mẫu số 2 :
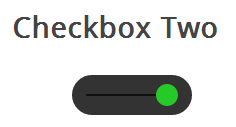
Mẫu checkbox này cũng giống như mẫu đầu tiên, tuy nhiên có một sự khác biệt ở đây đó là nút slider sẽ chuyển màu khi thay đổi trạng thái.
Đây là khung html chuẩn cho việc định dạng mẫu này như sau :
<div class="checkboxTwo">

   <input type="checkbox" value="1" id="checkboxTwoInput" name="" />

   <label for="checkboxTwoInput"></label>

</div>
Đầu tiên vẫn là định dạng cho thanh bar đầu tiên :
/**

 * Checkbox Two

 */

.checkboxTwo {

    width: 120px;

    height: 40px;

    background: #333;

    margin: 20px 60px;


    border-radius: 50px;

    position: relative;

}
Mẫu checkbox này còn có một inner bar, và chúng ta sẽ tận dụng :before pseudo class để làm inner bar này :
/**

 * Create the line for the circle to move across

 */

.checkboxTwo:before {

    content: '';

    position: absolute;

    top: 19px;

    left: 14px;

    height: 2px;

    width: 90px;

    background: #111;

}
Kế tiếp, chúng ta sẽ biến label thành button trên slider
/**

 * Create the circle to click

 */

.checkboxTwo label {

    display: block;

    width: 22px;

    height: 22px;

    border-radius: 50%;


    -webkit-transition: all .5s ease;

    -moz-transition: all .5s ease;

    -o-transition: all .5s ease;

    -ms-transition: all .5s ease;

    transition: all .5s ease;

    cursor: pointer;

    position: absolute;

    top: 9px;

    z-index: 1;

    left: 12px;

    background: #ddd;

}
Cuối cùng là hiển thị trạng thái khi checkbox được nhấn.
/**

 * Create the click event for the checkbox

 */

.checkboxTwo input[type=checkbox]:checked + label {

    left: 84px;

    background: #26ca28;

}
Mẫu số 3 :
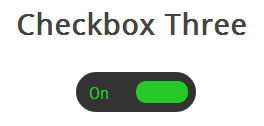
Mẫu này được nâng cấp lên từ mẫu số 2 với việc hiển thị dòng chữ On và Off, giúp người dùng dễ dàng phân biệt trạng thái checkbox hơn.
HTML
<div class="checkboxThree">

  <input type="checkbox" value="1" id="checkboxThreeInput" name="" />

  <label for="checkboxThreeInput"></label>

</div>
Định dạng cho Slider bar
/**

 * Checkbox Three

 */

.checkboxThree {

    width: 120px;

    height: 40px;

    background: #333;

    margin: 20px 60px;


    border-radius: 50px;

    position: relative;

}
Kế tiếp là định dạng cho hiển thị nội dung “On”
/**

 * Create the text for the On position

 */

.checkboxThree:before {

    content: 'On';

    position: absolute;

    top: 12px;

    left: 13px;

    height: 2px;

    color: #26ca28;

    font-size: 16px;

}
Off
/**

 * Create the label for the off position

 */

.checkboxThree:after {

    content: 'Off';

    position: absolute;

    top: 12px;

    left: 84px;

    height: 2px;

    color: #111;

    font-size: 16px;

}
Phần cuối là hiệu ứng slider di chuyển từ bên này sang bên kia.
/**

 * Create the pill to click

 */

.checkboxThree label {

    display: block;

    width: 52px;

    height: 22px;

    border-radius: 50px;


    -webkit-transition: all .5s ease;

    -moz-transition: all .5s ease;

    -o-transition: all .5s ease;

    -ms-transition: all .5s ease;

    transition: all .5s ease;

    cursor: pointer;

    position: absolute;

    top: 9px;

    z-index: 1;

    left: 12px;

    background: #ddd;

}


/**

 * Create the checkbox event for the label

 */

.checkboxThree input[type=checkbox]:checked + label {

    left: 60px;

    background: #26ca28;

}
Mẫu số 4 :
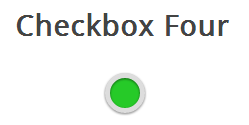
Ở mẫu này, chúng ta sẽ tạo một checkbox là một hình tròn, và khi click vào hình tròn bên trong, màu sẽ đổi khi checkbox được click.
HTML
<div class="checkboxFour">

  <input type="checkbox" value="1" id="checkboxFourInput" name="" />

  <label for="checkboxFourInput"></label>

</div>
Bây giờ chúng ta sẽ tạo một vòng tròn lớn bên ngoài.
/**

 * Checkbox Four

 */

.checkboxFour {

    width: 40px;

    height: 40px;

    background: #ddd;

    margin: 20px 90px;


    border-radius: 100%;

    position: relative;

    -webkit-box-shadow: 0px 1px 3px rgba(0,0,0,0.5);

    -moz-box-shadow: 0px 1px 3px rgba(0,0,0,0.5);

    box-shadow: 0px 1px 3px rgba(0,0,0,0.5);

}
Các bạn nên để ỷ chỗ này, chỉ việc để border-radius: 100%; là chúng ta có ngay một hình tròn. Nhớ kỹ thuật này cho lần dùng khác nhé.
Kế tiếp là chúng ta sẽ định dạng cho vòng tròn bên trong.
/**

 * Create the checkbox button

 */

.checkboxFour label {

    display: block;

    width: 30px;

    height: 30px;

    border-radius: 100px;


    -webkit-transition: all .5s ease;

    -moz-transition: all .5s ease;

    -o-transition: all .5s ease;

    -ms-transition: all .5s ease;

    transition: all .5s ease;

    cursor: pointer;

    position: absolute;

    top: 5px;

    left: 5px;

    z-index: 1;


    background: #333;


    -webkit-box-shadow:inset 0px 1px 3px rgba(0,0,0,0.5);

    -moz-box-shadow:inset 0px 1px 3px rgba(0,0,0,0.5);

    box-shadow:inset 0px 1px 3px rgba(0,0,0,0.5);

}
Khi click vào checkbo thì chúng ta sẽ thay đổi màu nền của hình tròn bên trong.
/**

 * Create the checked state

 */

.checkboxFour input[type=checkbox]:checked + label {

    background: #26ca28;

}
Mẫu số 5 :
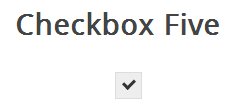
Có lẽ mẫu này khá giống với mẫu checkbox mặc định, tuy nhiên nó trông thanh mảnh và mềm mại hơn.
HTML
|
1
2
3
4
|
<div class="checkboxFive">
<input type="checkbox" value="1" id="checkboxFiveInput" name="" />
<label for="checkboxFiveInput"></label>
</div>
|
Với mẫu này, chúng ta không cần định dạng gì nhiều cho thẻ div.
/**

 * Checkbox Five

 */

.checkboxFive {

    width: 25px;

    margin: 20px 100px;

    position: relative;

}
Bây giờ phần tử label thì được định dạng như một checkbox.
/**

 * Create the box for the checkbox

 */

.checkboxFive label {

    cursor: pointer;

    position: absolute;

    width: 25px;

    height: 25px;

    top: 0;

    left: 0;

    background: #eee;

    border:1px solid #ddd;

}
Bây giờ chúng ta sẽ tạo biểu tượng ” đánh dấu ” (tick) bên trong checkbox.
/**

 * Display the tick inside the checkbox

 */

.checkboxFive label:after {

    opacity: 0.2;

    content: '';

    position: absolute;

    width: 9px;

    height: 5px;

    background: transparent;

    top: 6px;

    left: 7px;

    border: 3px solid #333;

    border-top: none;

    border-right: none;


    -webkit-transform: rotate(-45deg);

    -moz-transform: rotate(-45deg);

    -o-transform: rotate(-45deg);

    -ms-transform: rotate(-45deg);

    transform: rotate(-45deg);

}
Và hiệu ứng khi click
/**

 * Create the hover event of the tick

 */

.checkboxFive label:hover::after {

    opacity: 0.5;

}

/**

 * Create the checkbox state for the tick

 */

.checkboxFive input[type=checkbox]:checked + label:after {

    opacity: 1;

}
Mẫu số 6
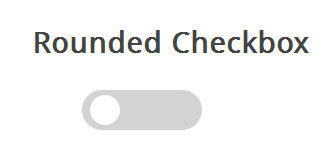
Đây là mẫu dành cho những ai yêu thích kiểu thiết kế phẳng (Flat Design).
HTML
<div class="flatRoundedCheckbox">

  <input type="checkbox" name="" id="flatOneRoundedCheckbox" value="1">

  <label for="flatOneRoundedCheckbox"></label>

  <div></div>

</div>
Đầu tiên chúng ta sẽ tạo slider bar như sau :
.flatRoundedCheckbox

{

    width: 120px;

    height: 40px;

    margin: 20px 50px;

    position: relative;

}

.flatRoundedCheckbox div

{

    width: 100%;

    height:100%;

    background: #d3d3d3;

    border-radius: 50px;

    position: relative;

    top:-30px;

}
Nút bấm :
.flatRoundedCheckbox label

{

    display: block;

    width: 30px;

    height: 30px;

    border-radius: 50px;


    -webkit-transition: all .5s ease;

    -moz-transition: all .5s ease;

    -o-transition: all .5s ease;

    -ms-transition: all .5s ease;

    transition: all .5s ease;

    cursor: pointer;

    position: absolute;

    top: 5px;

    z-index: 1;

    left: 8px;

    background: #FFF;

}
Và hiệu ứng khi click
.flatRoundedCheckbox input[type=checkbox]:checked ~ div

{

    background: #4fbe79;

}


.flatRoundedCheckbox input[type=checkbox]:checked ~ label {

    left: 85px;

}
Mẫu số 7 :
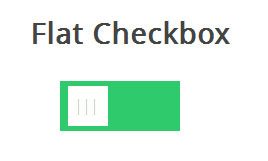
HTML
<div class="flatCheckbox">

   <input type="checkbox" name="" id="flatOneCheckbox" value="1">

   <label for="flatOneCheckbox"></label>

   <div></div>

</div>
Định dạng cho slider bar
.flatCheckbox

{

    width: 120px;

    height: 50px;

    margin: 20px 30px;

    position: relative;

}

.flatCheckbox div

{

    width: 100%;

    height:100%;

    background: #2fca6c;

    position: relative;

    top:-30px;

}
Nút bấm :
.flatCheckbox label

{

    display: block;

    width: 40px;

    height: 40px;


    -webkit-transition: all .5s ease;

    -moz-transition: all .5s ease;

    -o-transition: all .5s ease;

    -ms-transition: all .5s ease;

    transition: all .5s ease;

    cursor: pointer;

    position: absolute;

    top: 5px;

    z-index: 1;

    left: 8px;

    background: #fffffd;

}

.flatCheckbox label:before

{

    color: #ccc;

    content:'|||';

    font-size: 15px;

    letter-spacing: 1px;

    position: absolute;

    left: 7px;

    top:11px;

}
Hiệu ứng khi click
.flatCheckbox input[type=checkbox]:checked ~ div

{

    background: #e9513a;

}


.flatCheckbox input[type=checkbox]:checked ~ label {

    left: 75px;

}
Cuối cùng thì cũng đã xong trọn bộ 7 mẫu mà mình muốn giới thiệu cho các bạn. Thật sự mà nói thì post xong bài này mình mỏi cả lưng vì ngồi quá lâu ^^. Nhưng nếu nó giúp được nhiều cho các bạn thì mình thấy nó hoàn toàn xứng đáng.