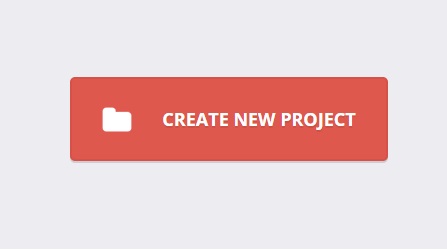
Mình đã giới thiệu cho các bạn nhiều button trong các bài viết trước, hôm nay mình sẽ chia sẻ cho các bạn một button đặc biệt, với button này, các bạn có thể có được 2 chức năng cùng một lúc. Hãy cùng thử tìm hiểu xem button này làm được những gì nhé.

Download
HTML
Đầu tiên, chúng ta cần có khung chuẩn html như sau :
<div class="button">

  <i class="fa fa-folder"></i>

  <span class="button-text">Create new project</span>

  <input id="project-name" class="hidden" type="text" placeholder="Project's name...">

</div>
CSS
Sau đó chúng ta định dạng button này với đoạn css sau :
@import url(https://fonts.googleapis.com/css?family=Open+Sans:700,400);

* {

  box-sizing: border-box;

  font-family: "Open Sans", sans-serif;

}


body {

  background-color: #EDEDF0;

  text-align: center;

}


p, a {

  color: #999;

  font-size: 12px;

  margin-bottom: 40px;

}


.button {

  display: inline-block;

  margin: 200px auto;

  padding-left: 90px;

  background-color: #de584d;

  border: 2px solid #d65147;

  border-radius: 5px;

  box-shadow: 0px 2px 0px #ceced1;

  background-image: url("http://i.imgur.com/gAtesxD.png");

  background-repeat: no-repeat;

  background-position: left 30px center;

  text-align: left;

  cursor: pointer;

}

.button i {

  font-size: 30px;

  display: none;

  color: #ffffff;

  margin-right: 30px;

  vertical-align: middle;

}

.button .button-text, .button input[type="text"], .button .hidden {

  font-size: 18px;

  -webkit-transition: all 0.1s ease-in-out;

  -moz-transition: all 0.1s ease-in-out;

  -ms-transition: all 0.1s ease-in-out;

  -o-transition: all 0.1s ease-in-out;

  transition: all 0.1s ease-in-out;

}

.button .button-text {

  color: white;

  font-weight: 700;

  text-transform: uppercase;

  text-shadow: 0px 2px #cc5147;

  display: inline-block;

  z-index: 1;

  line-height: 80px;

  padding-right: 30px;

  vertical-align: middle;

}

.button input[type="text"] {

  height: 80px;

  width: 224px;

  display: none;

  padding: 0 8px 0 20px;

  z-index: 2;

  outline: none;

}

.button .hidden {

  visibility: hidden !important;

  opacity: 0 !important;

}
jQuery
Tuy nhiên, để button có thể có hiệu ứng thì các bạn cần thêm đoạn javascript sau :
function theFunction($param1, $param2) {

    $param1.toggleClass('hidden');

  setTimeout(function() {

    $param1.css('display','none');

    $param2.css('display','inline-block');

  },100);

  setTimeout(function(){

      $param2.toggleClass('hidden');

  },200);

  setTimeout(function() {

    $param2.focus();

  },250);

};


$('.button-text').click(function() {

  theFunction($(this), $('#project-name'));

});


$('#project-name').focusout(function() {

  theFunction($(this), $('.button-text'));

  setTimeout(function() {

    $('#project-name').val('');

  },100);

});
Okie, That’s it. Chúc các bạn có được thêm những kinh nghiệm trong việc học css và jQuery , và nhất là có thêm một lựa chọn cho các button có trong trang web hay blog của các bạn.