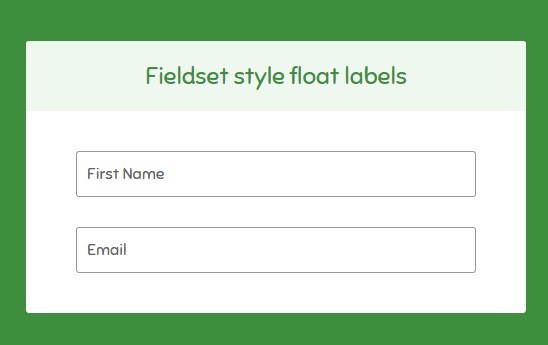
Hầu hết mọi website đều có form nhập liệu dùng để thu thập phản hồi hay liên lạc của người dùng. Nếu các bạn muốn gây bất ngờ cho khách viếng thăm trang web hay blog của các bạn mỗi khi họ nhập liệu, bằng những hiệu ứng cực pro, thì nên thử với hiệu ứng mà mình chia sẻ cho các bạn trong bài viết này. Với chỉ jQuery và vài dòng CSS là các bạn có thể áp dụng vào cho trang web của mình.

Download
HTML
Để minh họa form nhập liệu, chúng ta sẽ dùng đoạn html như sau :
<main>

    <h1>Fieldset style float labels</h1>

    <form class="flp">

        <div>

            <input type="text" id="fname" />

            <label for="fname">First Name</label>

        </div>

        <div>

            <input type="text" id="email" />

            <label for="email">Email</label>

        </div>

    </form>

</main>
CSS
Kế đến là các bạn copy đoạn css sau :
/*importing Sniglet*/

@import url("http://fonts.googleapis.com/css?family=Sniglet");


/*basic reset*/

* {margin: 0; padding: 0; box-sizing: border-box;}


body {

    padding-top: 100px;

    background: hsl(120, 40%, 40%);

    font-family: Sniglet;

}

main {

    width: 500px; margin: 0 auto; padding-bottom: 10px;

    background: white; border-radius: 3px; overflow: hidden;

}

h1 {

    font-size: 24px; font-weight: normal;

    background: hsl(120, 40%, 95%); color: hsl(120, 40%, 40%);

    text-align: center;

    padding: 20px 0; margin-bottom: 40px;

}


.flp {padding: 0 50px;}

/*Let's place the label over the input*/

.flp div {position: relative; margin-bottom: 30px;}


.flp input, .flp label {

    width: 400px; display: block;

    font: inherit; font-size: 16px; line-height: 24px;

    /*fixed height for FF line height issue.

    height = 24(lineheight) + 10*2(padding) + 2(border)*/

    height: 46px;

    border: 1px solid #999;

}

.flp input {padding: 10px; outline: none; border-radius: 3px;}

.flp label {

    position: absolute; left: 0; top: 0;

    /*left/right padding will be 2px less, adjusted by padding on .ch*/

    padding: 10px 8px;

    border-color: transparent; color: #666;

    cursor: text;

}


/*label styles*/

.ch {

    display: block; float: left;

    position: relative; /*for upward animation*/

    background: white;

}

.ch:first-child {padding-left: 2px;}

.ch:last-child {padding-right: 2px;}


/*active input label*/

.focussed {

    /*when any input is already focussed clicking on it(label) again won't do anything*/

    pointer-events: none;

}
jQuery
Đầu tiên, chúng ta sẽ khai báo thư viện jQuery và chèn thêm plugin jquery.easing.min.js vào :
<!-- jQuery -->

<script src="http://code.jquery.com/jquery-1.9.1.js"></script>

<!-- jQuery easing plugin for animation fun -->

<script src="jquery.easing.min.js" type="text/javascript"></script>
Kế tiếp là các bạn chèn thêm đoạn jQuery sau :
<script type="text/javascript">
//breakdown the labels into single character spans
$(".flp label").each(function(){
var sop = '<span class="ch">'; //span opening
var scl = '</span>'; //span closing
//split the label into single letters and inject span tags around them
$(this).html(sop + $(this).html().split("").join(scl+sop) + scl);
//to prevent space-only spans from collapsing
$(".ch:contains(' ')").html(" ");
})
var d;
//animation time
$(".flp input").focus(function(){
//calculate movement for .ch = half of input height
var tm = $(this).outerHeight()/2 *-1 + "px";
//label = next sibling of input
//to prevent multiple animation trigger by mistake we will use .stop() before animating any character and clear any animation queued by .delay()
$(this).next().addClass("focussed").children().stop(true).each(function(i){
d = i*50;//delay
$(this).delay(d).animate({top: tm}, 200, 'easeOutBack');
})
})
$(".flp input").blur(function(){
//animate the label down if content of the input is empty
if($(this).val() == "")
{
$(this).next().removeClass("focussed").children().stop(true).each(function(i){
d = i*50;
$(this).delay(d).animate({top: 0}, 500, 'easeInOutBack');
})
}
})
</script>
Thế là xong, bây giờ các bạn đã có thể tự kiểm tra thành quả của mình. Do thời gian có hạn nên mình không thể giải thích chi tiết từng đoạn code, nên có gì không hiểu các bạn cứ để lại tin nhắn dưới dạng comment để các bạn khác có thể giải thích và cùng nhau hỗ trợ.