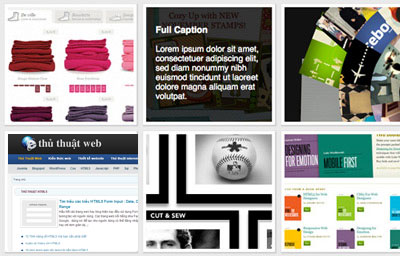
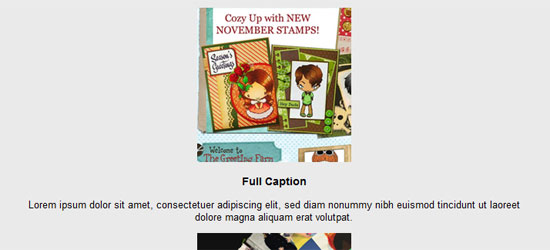
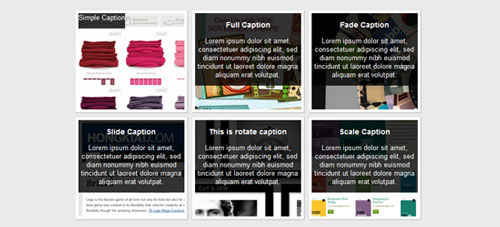
Caption Image là hiệu ứng mà khi chúng ta rê chuột vào hình, sẽ xuất hiện một đoạn chữ mô tả (do ta đặt từ trước) về tấm hình đó, đồng thời hình ảnh sẽ bị che mờ bởi một lớp bacground mỏng. Hôm nay mình sẽ cùng các bạn tạo ra các hiệu ứng này bằng CSS3 mà không cần phải dùng thêm JavaScript hay bất kỳ đoạn JQuery nào.

Trước khi tiến hành các bạn phải đảm bảo cài đặt trình duyệt phiên bản mới nhất. Sau đây là danh sách các trình duyệt chạy tốt hiệu ứng này :
– Internet Explorer 10+
– Firefox 6+
– Chrome 13+
– Safari 3.2+
– Opera 11+
Bây giờ chúng ta cùng bắt đầu nào :
Trước tiên, chúng ta sẽ tạo một cấu trúc HTML để làm demo minh họa, ở đây mình sẽ áp dụng cho 6 tấm hình trong demo này.
<div id="mainwrapper"><!-- This #mainwrapper ->

<!-- Image Caption 1 -->

<div id="box-1">

<img id="image-1" src="css3-image-captions/1.jpg"/>

<span>

<p>Simple Caption</p>

</span>

</div>


<!-- Image Caption 2 -->

<div id="box-2">

<img id="image-2" src="css3-image-captions/2.jpg"/>

<span>

<h3>Full Caption</h3>

<p>Lorem ipsum dolor sit amet, consectetuer adipiscing elit,sed diam nonummy nibh euismod tincidunt ut laoreet dolore magna aliquam erat volutpat.</p>

</span>

</div>


<!-- Image Caption 3 -->

<div id="box-3">

<img id="image-3" src="css3-image-captions/3.jpg"/>

<span>

<h3>Fade Caption</h3>

<p>Lorem ipsum dolor sit amet, consectetuer adipiscing elit,sed diam nonummy nibh euismod tincidunt ut laoreet dolore magna aliquam erat volutpat.</p>

</span>

</div>


<!-- Image Caption 4 -->

<div id="box-4">

<img id="image-4" src="css3-image-captions/4.jpg"/>

<span>

<h3>Slide Caption</h3>

<p>Lorem ipsum dolor sit amet, consectetuer adipiscing elit,sed diam nonummy nibh euismod tincidunt ut laoreet dolore magna aliquam erat volutpat.</p>

</span>

</div>


<!-- Image Caption 5 -->

<div id="box-5">

<div><!-- Rotating div -->

<img id="image-5" src="css3-image-captions/5.jpg"/>

<span>

<h3>This is rotate caption</h3>

<p>Lorem ipsum dolor sit amet, consectetuer adipiscing elit, sed diam nonummy nibh euismod tincidunt ut laoreet dolore magna aliquam erat volutpat.</p>

</span>

</div>

</div>

<!-- Image Caption 6 -->

<div id="box-6">

<img id="image-6" src="css3-image-captions/6.jpg"/>

<span>

<h3>Free Style Caption</h3>

<p>Lorem ipsum dolor sit amet,consectetuer adipiscing elit, sed diam nonummy nibh euismod tincidunt ut laoreet dolore magna aliquam erat volutpat.</p>

</span>

</div>

</div> <!-- end of #mainwrapper-->
Trước hết các bạn tạo một file mới, đặt tên là style.css, đây sẽ là file chứa các câu lệnh css của chúng ta. Khi sử dụng cho demo của chúng ta , các bạn đừng quên khai báo nó ở trong thẻ <head>
<link href="style.css" rel="stylesheet" type="text/css" media="screen" />
Bây giờ , các bạn mở file style.css này lên và từng bước tùy chỉnh nào , đầu tiên là cho id mainwrapper.
html { background-color: #eaeaea; }


#mainwrapper {

font: 10pt normal Arial, sans-serif;

height: auto;

margin: 80px auto 0 auto;

text-align: center;

width: 660px;

}

Image Box Style
Bây giờ chúng ta sẽ áp dụng thuộc tính chung cho tất cả các thẻ div chứa hình bên trong, cụ thể ở đây là thẻ div với class là ” box “.
#mainwrapper .box {

border: 5px solid #fff;

cursor: pointer;

height: 182px;

float: left;

margin: 5px;

position: relative;

overflow: hidden;

width: 200px;

-webkit-box-shadow: 1px 1px 1px 1px #ccc;

-moz-box-shadow: 1px 1px 1px 1px #ccc;

box-shadow: 1px 1px 1px 1px #ccc;

}


#mainwrapper .box img {

position: absolute;

left: 0;

-webkit-transition: all 300ms ease-out;

-moz-transition: all 300ms ease-out;

-o-transition: all 300ms ease-out;

-ms-transition: all 300ms ease-out;

transition: all 300ms ease-out;

}
Với việc khai báo như trên thì các hình sẽ được nằm cạnh nhau theo thứ tự với thuộc tính float:left. Các bạn chú ý thuộc tính overflow :hidden. Cái này sẽ làm cho mọi đối tượng nằm bên trong nó sẽ tạm thời không hiển thị ra bên ngoài.
Kế tiếp các bạn ap dụng thuộc tính transition chung cho từng Caption :
#mainwrapper .box .caption {

background-color: rgba(0,0,0,0.8);

position: absolute;

color: #fff;

z-index: 100;

-webkit-transition: all 300ms ease-out;

-moz-transition: all 300ms ease-out;

-o-transition: all 300ms ease-out;

-ms-transition: all 300ms ease-out;

transition: all 300ms ease-out;

left: 0;

}

Bây giờ là lúc chúng ta tạo riêng cho từng Caption với các hiệu ứng khác nhau :
Caption 1
Đây là một hiệu ứng đơn giản : Caption sẽ đến từ phía dưới khi bạn rê chuột vào hình .
#mainwrapper .box .simple-caption {

height: 30px;

width: 200px;

display: block;

bottombottom: -30px;

line-height: 25pt;

text-align: center;

}
Caption 2
Trong hiệu ứng này , caption sẽ chạy từ trên xuống dưới :
#mainwrapper .box .full-caption {

width: 170px;

height: 170px;

top: -200px;

text-align: left;

padding: 15px;

}
Caption 3
Caption sẽ xuất hiện với hiệu ứng fading.
#mainwrapper .box .fade-caption, #mainwrapper .box .scale-caption {

opacity: 0;

width: 170px;

height: 170px;

text-align: left;

padding: 15px;

}
Caption 4
Caption sẽ xuất hiện từ trái sang phải.
** Caption 4: Slide **/

#mainwrapper .box .slide-caption {

width: 170px;

height: 170px;

text-align: left;

padding: 15px;

left: 200px;

}
Caption 5
Caption sẽ xuất hiện bằng cách quay vòng 180 độ
#mainwrapper #box-5.box .rotate-caption {

width: 170px;

height: 170px;

text-align: left;

padding: 15px;

top: 200px;

-moz-transform: rotate(-180deg);

-o-transform: rotate(-180deg);

-webkit-transform: rotate(-180deg);

transform: rotate(-180deg);

}


#mainwrapper .box .rotate {

width: 200px;

height: 400px;

-webkit-transition: all 300ms ease-out;

-moz-transition: all 300ms ease-out;

-o-transition: all 300ms ease-out;

-ms-transition: all 300ms ease-out;

transition: all 300ms ease-out;

}
Caption 6
#mainwrapper .box .scale-caption h3, #mainwrapper .box .scale-caption p {

position: relative;

left: -200px;

width: 170px;

-webkit-transition: all 300ms ease-out;

-moz-transition: all 300ms ease-out;

-o-transition: all 300ms ease-out;

-ms-transition: all 300ms ease-out;

transition: all 300ms ease-out;

}


#mainwrapper .box .scale-caption h3 {

-webkit-transition-delay: 300ms;

-moz-transition-delay: 300ms;

-o-transition-delay: 300ms;

-ms-transition-delay: 300ms;

transition-delay: 300ms;

}


#mainwrapper .box .scale-caption p {

-webkit-transition-delay: 500ms;

-moz-transition-delay: 500ms;

-o-transition-delay: 500ms;

-ms-transition-delay: 500ms;

transition-delay: 500ms;

}
Bây giờ chúng ta sẽ cho từng hiệu ứng chuyển động :
Caption 1 :
#mainwrapper .box:hover .simple-caption {

-moz-transform: translateY(-100%);

-o-transform: translateY(-100%);

-webkit-transform: translateY(-100%);

transform: translateY(-100%);

}
Caption 2 :
#mainwrapper .box:hover .full-caption {

-moz-transform: translateY(100%);

-o-transform: translateY(100%);

-webkit-transform: translateY(100%);

transform: translateY(100%);

}
Caption 3 :
#mainwrapper .box:hover .fade-caption {

opacity: 1;

}
Caption 4 :
#mainwrapper .box:hover .slide-caption {

background-color: rgba(0,0,0,1) !important;

-moz-transform: translateX(-100%);

-o-transform: translateX(-100%);

-webkit-transform: translateX(-100%);

opacity: 1;

transform: translateX(-100%);

}

#mainwrapper .box:hover img#image-4 {

-moz-transform: translateX(-100%);

-o-transform: translateX(-100%);

-webkit-transform: translateX(-100%);

transform: translateX(-100%);

}
Caption 5 :
/** Rotate Caption :hover Behaviour **/

#mainwrapper .box:hover .rotate {

background-color: rgba(0,0,0,1) !important;

-moz-transform: rotate(-180deg);

-o-transform: rotate(-180deg);

-webkit-transform: rotate(-180deg);

transform: rotate(-180deg);

}
Caption 6 :
#mainwrapper .box:hover #image-6 {

-moz-transform: scale(1.4);

-o-transform: scale(1.4);

-webkit-transform: scale(1.4);

transform: scale(1.4);

}

#mainwrapper .box:hover .scale-caption h3,

#mainwrapper .box:hover .scale-caption p {

-moz-transform: translateX(200px);

-o-transform: translateX(200px);

-webkit-transform: translateX(200px);

transform: translateX(200px);

}
Vậy là xong, các bạn đã có thêm một kinh nghiệm trong việc sử dụng CSS3, tuy nhiên các bạn nên xem xét cẩn thận khi sử dụng, vì các trình duyệt hiên nay vẫn chưa hỗ trợ tốt .