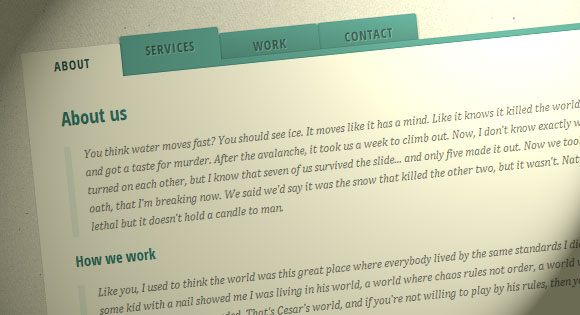
Content tabs rất đỗi quen thuộc và chúng ta sẽ dễ dàng bắt gặp nó mỗi khi duyệt web trên internet. Có rất nhiều cách để tạo ra dạng tab cho nội dung web. Trong bài viết trước mình đã giới thiệu cho các bạn Tạo tab content với plugin jQuery Tabulous. Hôm nay chúng ta sẽ không sử dụng bất kì đoạn mã jQuery nào, mà chỉ tuyệt đối dùng hoàn toàn bằng CSS3.

Bước 1 : Markup HTML
Chúng ta sẽ sử dụng phần tử input để kết nối với phần nội dung của từng tab.
<section class="tabs">

    <input id="tab-1" type="radio" name="radio-set" class="tab-selector-1" checked="checked" />

    <label for="tab-1" class="tab-label-1">About us</label>


    <input id="tab-2" type="radio" name="radio-set" class="tab-selector-2" />

    <label for="tab-2" class="tab-label-2">How we work</label>


    <input id="tab-3" type="radio" name="radio-set" class="tab-selector-3" />

    <label for="tab-3" class="tab-label-3">References</label>


    <input id="tab-4" type="radio" name="radio-set" class="tab-selector-4" />

    <label for="tab-4" class="tab-label-4">Contact us</label>


    <div class="clear-shadow"></div>


    <div class="content">

        <div class="content-1">

            <p>Some content</p>

        </div>

        <div class="content-2">

            <p>Some content</p>

        </div>

        <div class="content-3">

            <p>Some content</p>

        </div>

        <div class="content-4">

            <p>Some content</p>

        </div>

    </div>

</section>
Bước 2 : Phần CSS
Điều đầu tiên chúng ta cần làm là chỉ định một vài kích thước và cho ẩn các thẻ input bằng cách ấn định opacity là 0
tabs {

    position: relative;

    margin: 40px auto;

    width: 750px;

}


.tabs input {

    position: absolute;

    z-index: 1000;

    width: 120px;

    height: 40px;

    left: 0px;

    top: 0px;

    opacity: 0;

    cursor: pointer;

}

.tabs input#tab-2{

    left: 120px;

}

.tabs input#tab-3{

    left: 240px;

}

.tabs input#tab-4{

    left: 360px;

}
Các thẻ input sẽ nằm bên trên các labels, và điều này giúp chúng ta mỗi khi click vào label thì cũng như click vào phần input. Kế tiếp chúng ta sẽ định dạng các labels sẽ trông giống như các thẻ tabs
.tabs label {

    background: linear-gradient(top, #5ba4a4 0%,#4e8c8a 100%);

    font-size: 15px;

    line-height: 40px;

    height: 40px;

    position: relative;

    padding: 0 20px;

    float: left;

    display: block;

    width: 80px;

    color: #385c5b;

    letter-spacing: 1px;

    text-transform: uppercase;

    font-weight: bold;

    text-align: center;

    text-shadow: 1px 1px 1px rgba(255,255,255,0.3);

    border-radius: 3px 3px 0 0;

    box-shadow: 2px 0 2px rgba(0,0,0,0.1), -2px 0 2px rgba(0,0,0,0.1);

}


.tabs input:hover + label {

    background: #5ba4a4;

}


.tabs label:first-of-type {

    z-index: 4;

    box-shadow: 2px 0 2px rgba(0,0,0,0.1);

}


.tab-label-2 {

    z-index: 3;

}


.tab-label-3 {

    z-index: 2;

}


.tab-label-4 {

    z-index: 1;

}
Chúng ta sẽ bỏ hiệu ứng bóng đổ ở phần cuối của box-shadow bằng cách đè lên nó với thuộc tính :after pseudo-element
.tabs label:after {

    content: '';

    background: #fff;

    position: absolute;

    bottom: -2px;

    left: 0;

    width: 100%;

    height: 2px;

    display: block;

}
Khi chúng ta click vào tab (label) thì tab này sẽ chuyển sang màu khác so với các tab còn lại
.tabs input:checked + label {

    background: #fff;

    z-index: 6;

}
Chúng ta đã làm xong ở phần tab, bây giờ chúng ta sẽ làm ơ phần nội dung cho từng tab.
.content {

    background: #fff;

    position: relative;

    width: 100%;

    height: 370px;

    z-index: 5;

    box-shadow: 0 -2px 3px -2px rgba(0,0,0,0.2), 0 2px 2px rgba(0,0,0,0.1);

    border-radius: 0 3px 3px 3px;

}


.content div {

    position: absolute;

    top: 0;

    left: 0;

    padding: 10px 40px;

    z-index: 1;

    opacity: 0;

    transition: all linear 0.1s;

}


.content div h2,

.content div h3{

    color: #398080;

}

.content div p {

    font-size: 14px;

    line-height: 22px;

    font-style: italic;

    text-align: left;

    margin: 0;

    color: #777;

    padding-left: 15px;

    font-family: Cambria, Georgia, serif;

    border-left: 8px solid rgba(63,148,148, 0.1);

}
Khi chúng ta muốn nội dung từng tab được hiển thị, chúng ta sẽ ấn định giá trị opacity là 1 , và tăng z-index lên.
.tabs input.tab-selector-1:checked ~ .content .content-1,

.tabs input.tab-selector-2:checked ~ .content .content-2,

.tabs input.tab-selector-3:checked ~ .content .content-3,

.tabs input.tab-selector-4:checked ~ .content .content-4 {

    z-index: 100;

    opacity: 1;

    transition: all ease-out 0.2s 0.1s;

}
Vậy là xong rồi đó các bạn.