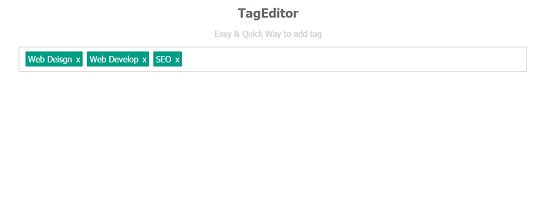
Khi viết bài, hầu hết các website đêu có chức năng chèn tag , điều này sẽ giúp người dùng dễ dàng tìm kiếm bài viết theo chủ đề mà họ muốn, cũng như tạo các từ khóa tìm kiếm trên các bộ máy tìm kiếm như Google hay Yahoo…. Nếu các bạn cũng muốn tự tạo cho mình chức năng chèn tag thì mình sẽ chia sẻ cho các bạn đoạn script nhỏ, với đoạn script bằng jQuery này, các bạn có thể tự sáng tạo ra những chức năng khác cho website hay blog của mình.

Download
HTML
Như thường lệ, chúng ta cũng cần có khung chuẩn html như sau :
<ul class="tags">

       <li class="addedTag">Web Deisgn<span onclick="$(this).parent().remove();" class="tagRemove">x</span><input type="hidden" name="tags[]" value="Web Deisgn"></li>


        <li class="addedTag">Web Develop<span onclick="$(this).parent().remove();" class="tagRemove">x</span><input type="hidden" name="tags[]" value="Web Develop"></li>


        <li class="addedTag">SEO<span onclick="$(this).parent().remove();" class="tagRemove">x</span><input type="hidden" name="tags[]" value="SEO"></li>

                    <li class="tagAdd taglist">

                         <input type="text" id="search-field">

                    </li>

</ul>
Trong đoạn code bên trên, chúng ta sẽ chèn tags mặc định là Web Design, Web Develop và SEO. Các bạn có thể thay đổi những giá trị này theo ý muốn của mình.
CSS
Các bạn cần chèn thêm một ít đoạn css để định dạng cho css :
.tags {

    background: none repeat scroll 0 0 #fff;

    border: 1px solid #ccc;

    display: table;

    padding: 0.5em;

    width: 100%;

}

.tags li.tagAdd, .tags li.addedTag {

    float: left;

    margin-left: 0.25em;

    margin-right: 0.25em;

}

.tags li.addedTag {

    background: none repeat scroll 0 0 #019f86;

    border-radius: 2px;

    color: #fff;

    padding: 0.25em;

}

.tags input, li.addedTag {

    border: 1px solid transparent;

    border-radius: 2px;

    box-shadow: none;

    display: block;

    padding: 0.5em;

}

.tags input:hover {

    border: 1px solid #000;

}

span.tagRemove {

    cursor: pointer;

    display: inline-block;

    padding-left: 0.5em;

}

span.tagRemove:hover {

    color: #222222;

}
jQuery
Sau đây là trái tim của chức năng này, các bạn copy đoạn script sau và áp dụng nó vào trong trang web hay blog của các bạn.
$(document).ready(function() {

$('#addTagBtn').click(function() {

                $('#tags option:selected').each(function() {

                    $(this).appendTo($('#selectedTags'));

                });

            });

            $('#removeTagBtn').click(function() {

                $('#selectedTags option:selected').each(function(el) {

                    $(this).appendTo($('#tags'));

                });

            });

 $('.tagRemove').click(function(event) {

                event.preventDefault();

                $(this).parent().remove();

            });

            $('ul.tags').click(function() {

                $('#search-field').focus();

            });

            $('#search-field').keypress(function(event) {

                if (event.which == '13') {

                    if ($(this).val() != '') {

                        $('<li class="addedTag">' + $(this).val() + '<span class="tagRemove" onclick="$(this).parent().remove();">x</span><input type="hidden" value="' + $(this).val() + '" name="tags[]"></li>').insertBefore('.tags .tagAdd');

                        $(this).val('');

                    }

                }

            });


  });
Chức năng tuy nhỏ, nhưng nó lại là một phần không thể thiếu trong các trang web, mình hy vọng các bạn có thể học được nhiều từ đoạn script mà mình chia sẻ trong bài viết này.